前回まで作った PostgreSQL と python 環境に加えて、React アプリの APIサーバ の役割を担当する Django REST framework 環境を作ります。
サーバ環境
- Python 3.7.3
- Django 2.2.2
- PostgreSQL 11.4
- Django REST framework 3.9.4
Python 仮想環境が必要です。事前に構築しておいてください。
PostgreSQL DB 環境が必要です。事前に構築しておいてください。

Django 環境構築
/reactjs/snowball/backend ディレクトリを作成して React アプリ開発:Backend 構築 〜 pyenv & Anaconda の Python 環境 〜|CentOS7 記事で作成した仮想環境 py37 に入ります。
[admin@centos7 snowball]$ mkdir backend
[admin@centos7 snowball]$ cd backend
[admin@centos7 backend]$
[admin@centos7 ~]$ source activate py37

(py37) [admin@centos7 ~]$ python -V
Python 3.7.3
Django をインストール
conda 環境に入って、pip install を使って Django をインストールします。
(py37) [admin@centos7 backend]$ pip install --upgrade pip
(py37) [admin@centos7 backend]$ pip install django
(py37) [admin@centos7 backend]$ pip install djangorestframework
Django プロジェクトを作成
(py37) [admin@centos7 backend]$ django-admin startproject snowball .
(py37) [admin@centos7 backend]$ ll
合計 4
-rwxrwxr-x 1 admin admin 628  6月 26 13:11 manage.py
drwxrwxr-x 2 admin admin  70  6月 26 13:11 snowball
パッケージをインストール
requirements.txt を /reactjs/snowball/backend にコピペします。
(py37) [admin@centos7 backend]$ pip install -r /reactjs/snowball/backend/requirements.txt
パッケージをアップグレード ( 任意 )
全てのローカルパッケージをアップグレードする場合
pip-review を利用します。
(py37) [admin@centos7 backend]$ pip install pip-review
(py37) [admin@centos7 backend]$ pip-review --auto
個別にアップグレードする場合
–upgrade か -U オプションを利用します。
$ pip install --upgrade package_name
 or,
$ pip install -U package_name
最新 requirements.txt を作成
(py37) [admin@centos7 backend]$ mv requirements.txt requirements.txt.org
(py37) [admin@centos7 backend]$ pip freeze > requirements.txt
Django App を作成
アプリ名:projects ( 任意 )
(py37) [admin@centos7 backend]$ python manage.py startapp projects
必要に応じて models.py、serializers.py、urls.py、views.py などのファイルに設定を追加します。
※ 何も設定しなくても Django サイトの動作確認はできます。
DB 作成
PostgreSQL の設置がが必要な方は React アプリ開発:Backend 構築 〜 PostgreSQL DB 環境 〜|CentOS7 記事をご覧ください。
CREATE USER your-account PASSWORD ‘your-db-password’;
CREATE DATABASE snowball OWNER your-account;
(py37) [admin@centos7 backend]$ sudo -u postgres psql -U postgres

postgres=# select current_user;
 current_user
--------------
 postgres
(1 行)

postgres=# select * from pg_user;
 usename  | usesysid | usecreatedb | usesuper | userepl | usebypassrls |  passwd  | valuntil | useconfig
----------+----------+-------------+----------+---------+--------------+----------+----------+-----------
 postgres |       10 | t           | t        | t       | t            | ******** |          |
(1 行)

postgres=# \l
                                         データベース一覧
   名前    |  所有者  | エンコーディング |  照合順序   | Ctype(変換演算子) |      アクセス権
-----------+----------+------------------+-------------+-------------------+-----------------------
 postgres  | postgres | UTF8             | en_US.UTF-8 | en_US.UTF-8       |
 template0 | postgres | UTF8             | en_US.UTF-8 | en_US.UTF-8       | =c/postgres          +
           |          |                  |             |                   | postgres=CTc/postgres
 template1 | postgres | UTF8             | en_US.UTF-8 | en_US.UTF-8       | =c/postgres          +
           |          |                  |             |                   | postgres=CTc/postgres
(3 行)

postgres=# CREATE USER your-account PASSWORD 'your-db-password';
CREATE ROLE
postgres=# CREATE DATABASE snowball OWNER your-account;
CREATE DATABASE
postgres=#
postgres=# \l
                                          データベース一覧
   名前    |  所有者   | エンコーディング |  照合順序   | Ctype(変換演算子) |      アクセス権
-----------+--------------+------------------+-------------+-------------------+-----------------------
 postgres  | postgres     | UTF8             | en_US.UTF-8 | en_US.UTF-8       |
 snowball  | your-account | UTF8             | en_US.UTF-8 | en_US.UTF-8       |
 template0 | postgres     | UTF8             | en_US.UTF-8 | en_US.UTF-8       | =c/postgres          +
           |              |                  |             |                   | postgres=CTc/postgres
 template1 | postgres     | UTF8             | en_US.UTF-8 | en_US.UTF-8       | =c/postgres          +
           |              |                  |             |                   | postgres=CTc/postgres
(4 行)

postgres=# select * from pg_user;
  usename  | usesysid | usecreatedb | usesuper | userepl | usebypassrls |  passwd  | valuntil | useconf
ig
-----------+----------+-------------+----------+---------+--------------+----------+----------+--------
---
 postgres  |       10 | t           | t        | t       | t            | ******** |          |
 snowadmin |    16384 | f           | f        | f       | f            | ******** |          |
(2 行)

postgres=#
postgres=# \q
(py37) [admin@centos7 backend]$
DB 情報を Django へ反映する
デフォルトの sqlist3 をコメントアウトして、postgresql を有効化します。
(py37) [admin@centos7 backend]$ vi snowball/settings.py
...
 76 #DATABASES = {
 77 #    'default': {
 78 #        'ENGINE': 'django.db.backends.sqlite3',
 79 #        'NAME': os.path.join(BASE_DIR, 'db.sqlite3'),
 80 #    }
 81 #}
 82
 83 DATABASES = {
 84     'default': {
 85         'ENGINE': 'django.db.backends.postgresql',
 86         'NAME': 'snowball',
 87         'USER': 'your-id',
 88         'PASSWORD': 'your-password',
 89         'HOST': 'localhost',
 90         'PORT': '5432',
 91     }
...
Ident authentication エラーに対処
ユーザ認証が必要なコマンドを打つと、Ident authentication エラーになるので対処して置きます。( サーバを起動したり、python manage.py migrateコマンドを実行する際発生 )
ライン番号 83、86 のように ident を md5 に変更します。
(py37) [admin@centos7 backend]$ conda deactivate
[admin@centos7 backend]$ sudo vi /var/lib/pgsql/11/data/pg_hba.conf
     77 # TYPE  DATABASE        USER            ADDRESS                 METHOD
     78
     79 # "local" is for Unix domain socket connections only
     80 local   all             all                                     peer
     81 # IPv4 local connections:
     82 # host    all             all             127.0.0.1/32            ident
     83 host    all             all             127.0.0.1/32             md5
     84 # IPv6 local connections:
     85 # host    all             all             ::1/128                 ident
     86 host    all             all             ::1/128                 md5

# PostgreSQLを再起動
[admin@centos7 backend]$ sudo systemctl restart postgresql-11.service
Django Migration および User 作成
何も設定しなくてもサイトの動作確認はできます。
[admin@centos7 backend]$ cd /reactjs/snowball/backend
[admin@centos7 backend]$ source activate py37
(py37) [admin@centos7 backend]$

# migration
(py37) [admin@centos7 backend]$ python manage.py makemigrations projects
(py37) [admin@centos7 backend]$ python manage.py migrate

# User 作成
(py37) [admin@centos7 backend]$ python manage.py createsuperuser
Username (leave blank to use 'admin'): admin
Email address: your@email.com
Password: <パスワード>
Password (again): <パスワード>
Superuser created successfully.
(py37) [admin@centos7 backend]$
Firewalld 設定
(py37) [admin@centos7 backend]$ conda deactivate
[admin@centos7 backend]$ sudo firewall-cmd --add-port=8000/tcp --permanent
success
[admin@centos7 backend]$ sudo firewall-cmd --reload
success

# 確認
[admin@centos7 backend]$ sudo firewall-cmd --list-all
Django 開発サーバ起動
開発サーバを起動します。
[admin@centos7 backend]$ conda activate py37
(py37) [admin@centos7 backend]$ python manage.py runserver 0:8000
Watching for file changes with StatReloader
Performing system checks...

System check identified no issues (0 silenced).
June 26, 2019 - 16:17:01
Django version 2.2.2, using settings 'snowball.settings'
Starting development server at http://0:8000/
Quit the server with CONTROL-C.
以下は Django project を設定した場合のみ必要です。
何も設定しなかった場合は、ブラウザで接続 に飛ばしてください。
サイトを設定
Django Adminサイトへ接続してサイトを追加するとサイト ID が確認できます。
Django Adminサイト: http://<your-ip-address>:8000/admin/

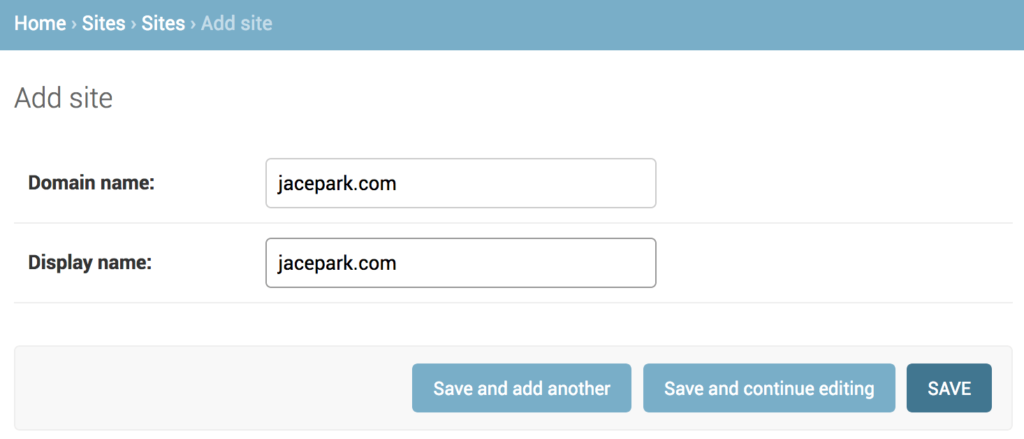
サイトを追加した後、サイト名をクリックし、リンクに表示されたサイト ID を確認します。もしくは、サイト名にマウスオーバーすると左下のステータスウィンドウに表示される ID を確認します。

Django Project の設定ファイルに反映する
[admin@centos7 backend]$ vi snowball/settings.py
...

SITE_ID = 5

...
ブラウザで接続
ALLOWED_HOSTS へ IP アドレスやサイト名を追加します。
10.10.1.10 と jacepark.com を追加する例:
[admin@centos7 backend]$ vi snowball/settings.py

ALLOWED_HOSTS = ['10.10.1.10','jacepark.com','localhost','127.0.0.1',..]
※ エラー文:
Disallowed Host at \
Invalid HTTP_HOST header: ‘10.10.1.10:8000’. You may need to add ‘10.10.1.10’ to ALLOWED_HOSTS.
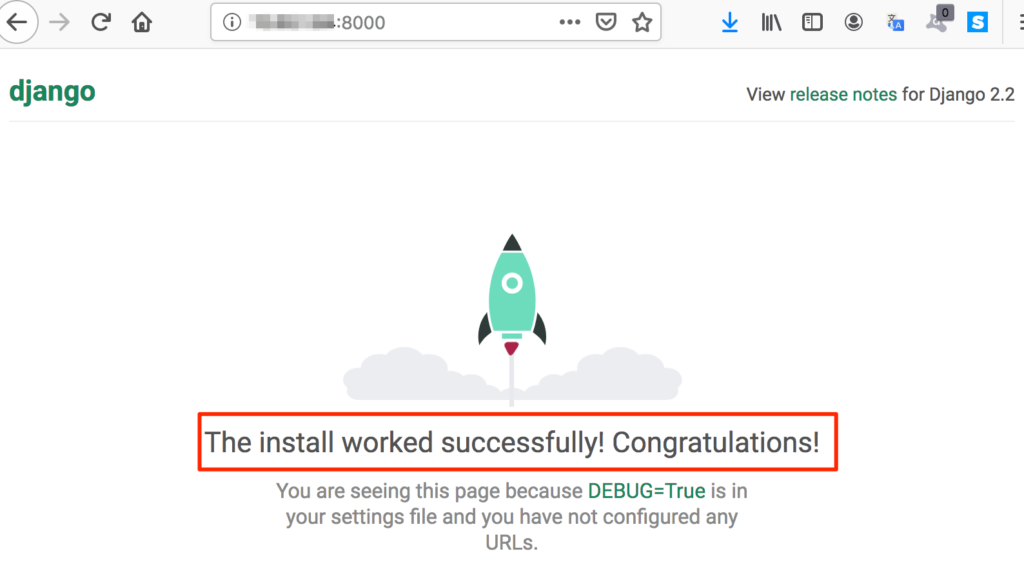
<your-ip-address>:8000 or <your-domain>:8000 に接続します。
▼ 何も設定しなかった場合、The install worked successfully! Congratulations!ページが表示されます。
▼ Django API設定をした場合、Django REST framework ページが表示されます。

これで APIサーバ の開発環境 が整いました。
後はユーザを管理するための SignUp、SignIn や ソーシャルログイン、メール認証など、開発に必要な機能を追加できます。また、React のバックアンド環境の設定を React 側で行えます。これらはまた次回にポストします。
参考文献
django.core.management | commands
Django SSL / HTTPS

コメント