
※ ウェブサイトで Search Console を使用するには、有効な Google アカウントが必要です。
・アカウントには、ウェブサイトやモバイルアプリなどのプロパティを 1,000 個まで追加できます。
Search Console にウェブサイトを追加する より抜粋&編集
・サイトは Search Console に追加されると、「プロパティ」と呼ばれます。
現状・条件
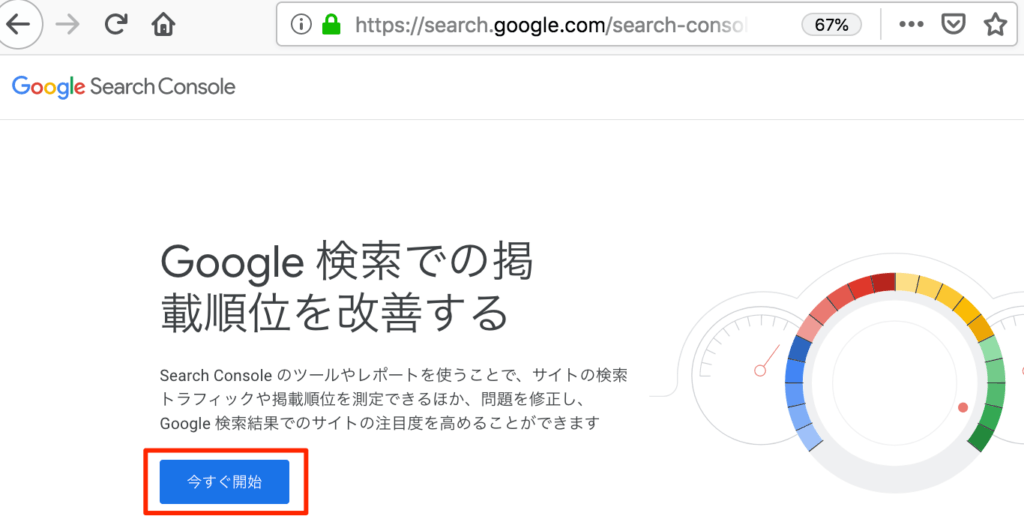
Search Console にサイトを登録する
▼ Search Console にアクセスして「今すぐ開始」ボタンをクリックします。
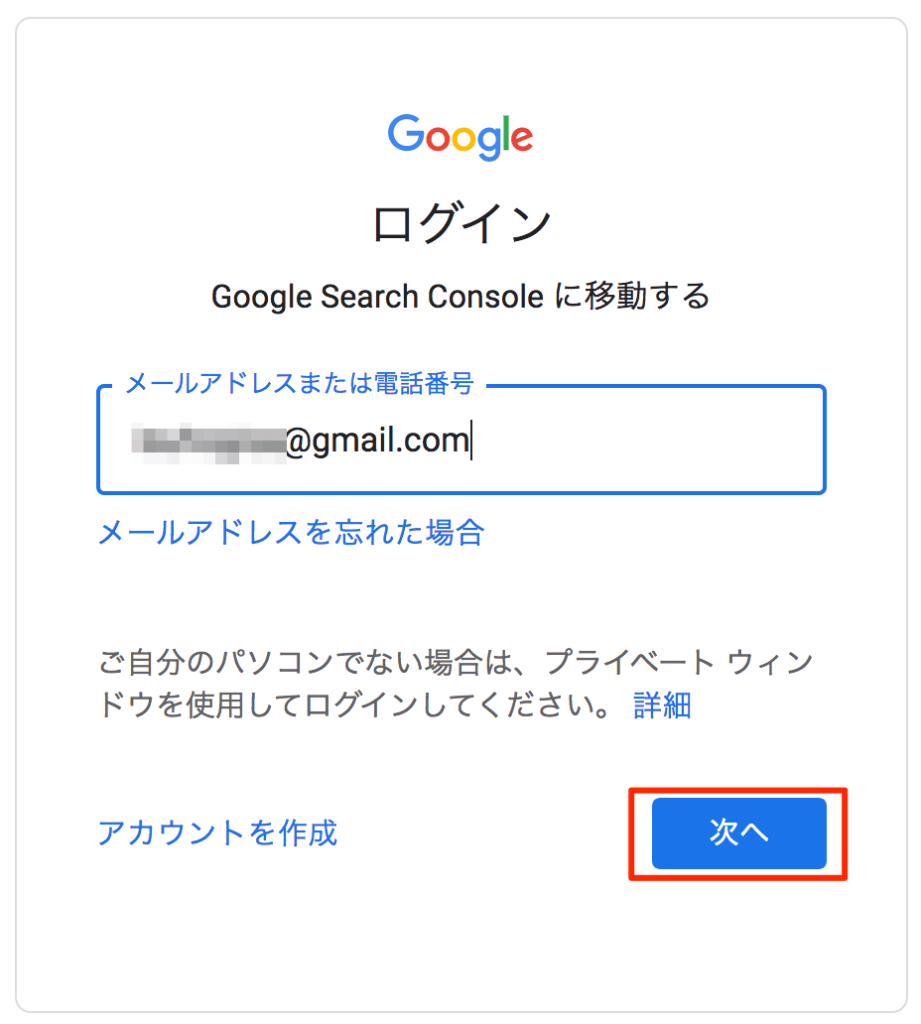
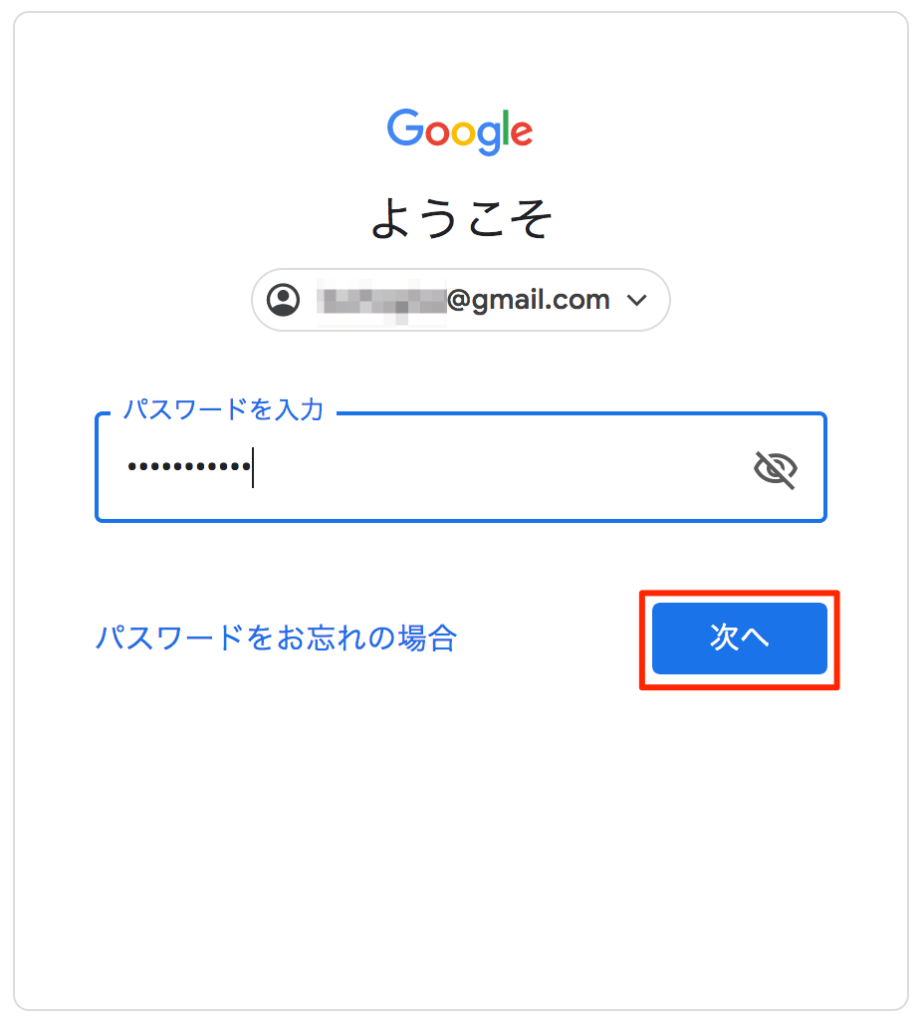
▼ 使用する Google アカウントでログインしてください。
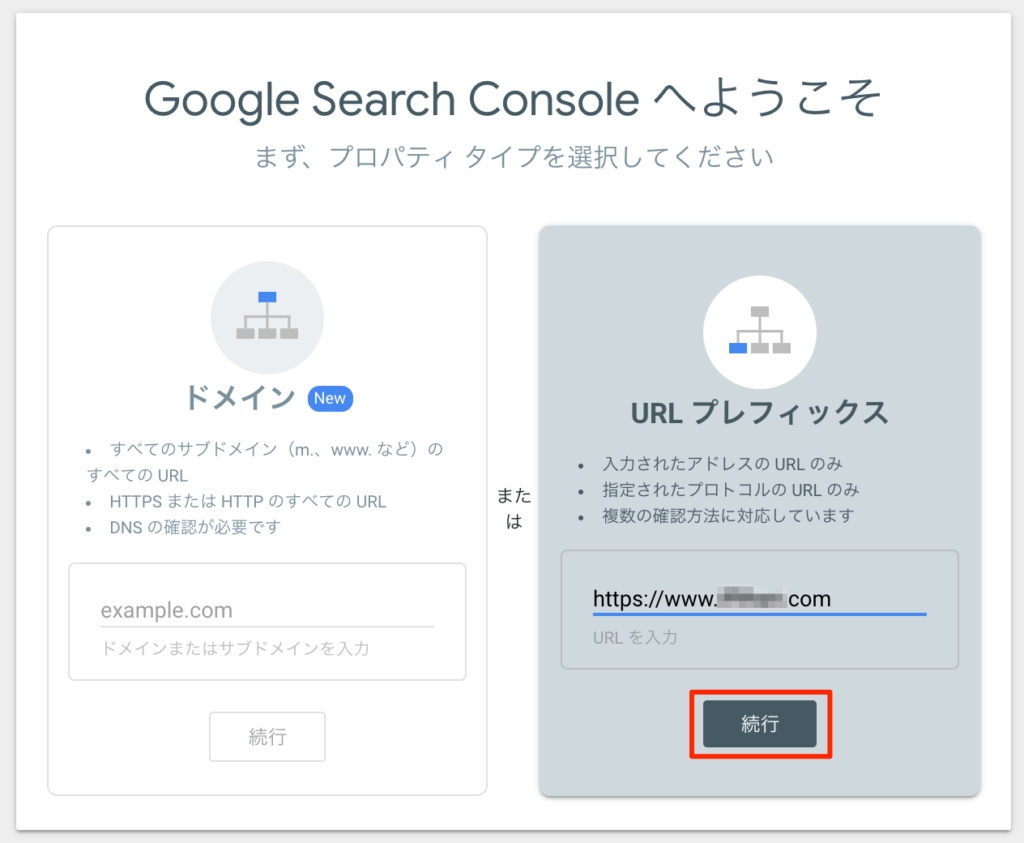
▼ プロパティ タイプを「URL プレフィックス」にします。追加するサイトの URL を入力して「続行」ボタンをクリックしてください。
※ 「ドメイン」を選択すると DNS レコードに TXT 設定が必要です。自宅サーバ環境や DNS 設定が可能な場合は選択してもいいでしょう。
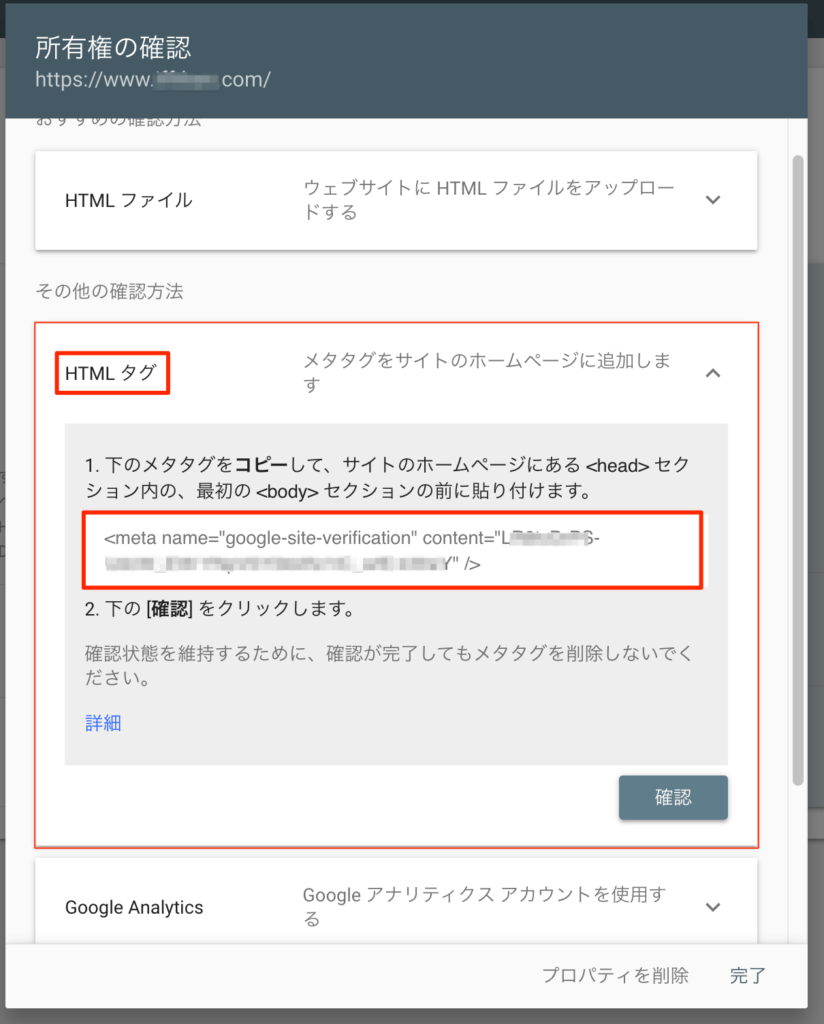
▼「HTMLタグ」のメタタグをコピーします。
※「確認」ボタンはまだ、クリックしないでください。
サイトの所有権を確認する
WordPress 管理画面から、
・押下:「Cocoon設定」>「Cocoon設定」>「アクセス解析・認証」
・ページ内:
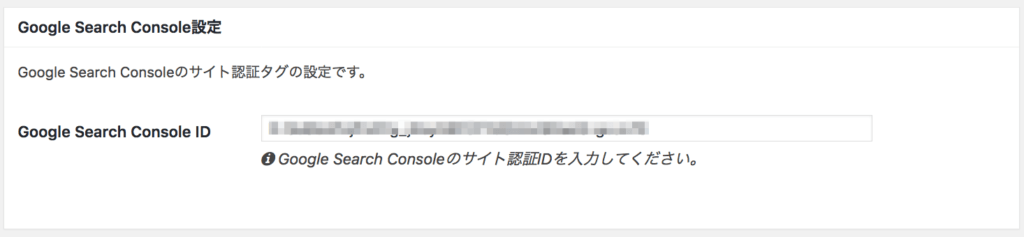
▼「Google Search Console ID 設定」>「Google Search Console ID」にコピーしたコードの中で「content=」に続く「””」内の文字列 ( コード ) だけをペーストしてください。
「変更をまとめて保存」ボタンをクリックしてください。
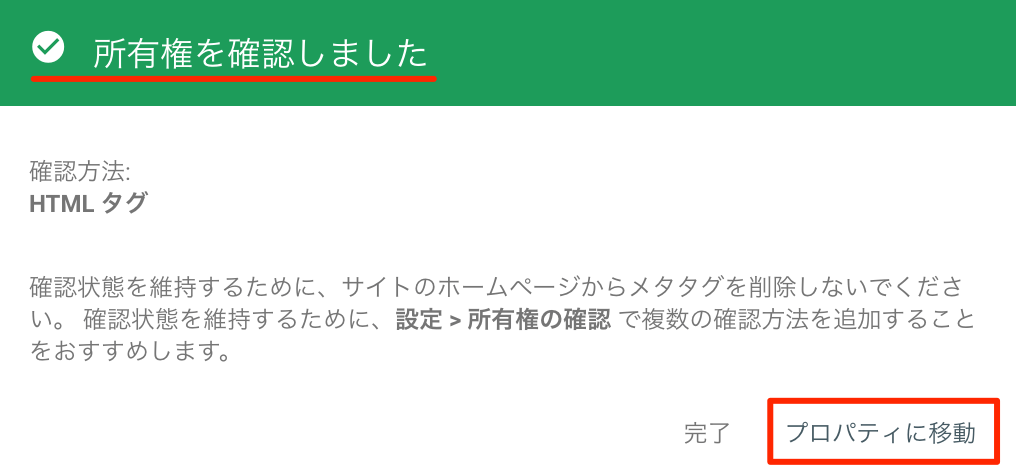
Search Console ページから、
「確認」ボタンをクリックして所有権を確認しましょう!
All in One SEO Pack のウェブマスター認証を設定
WordPress 管理画面から、
・押下:「All in One SEO」>「一般設定」
・ページ内:
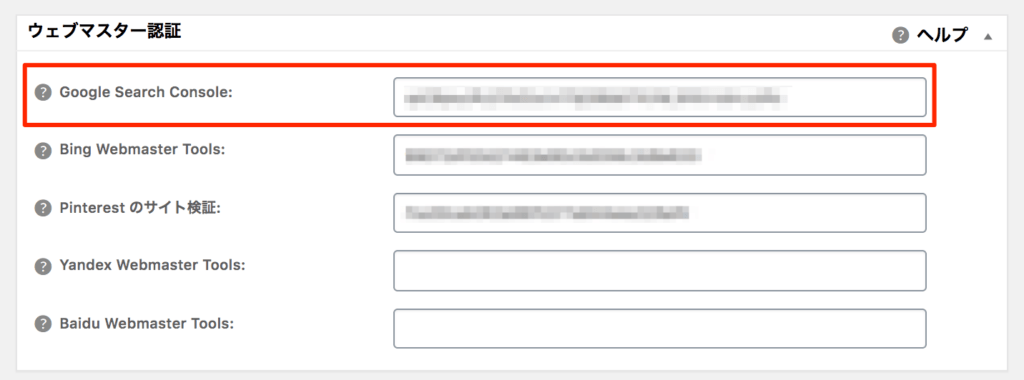
▼「ウェブマスター認証」>「Google Search Console」に先ほどのメタタグの Content 属性の値だけコピーペしてください。
「設定を更新」ボタンをクリックしてください。
これで、Search Console にサイトを登録して、All in One SEO Pack にも設定を完了しました。
これから、
All in One SEO Pack で XML サイトマップを作成 して、Search Consoleにサイトマップを送信して 検索エンジン最適化 ( SEO ) を開始しましょう!
Google では、すべてのウェブサイトで可能な場合は https:// を使用することをおすすめします。
ホスト名とはウェブサイトがホストされている場所で、通常は、メールで使用しているのと同じドメイン名を使用します。
Google では「www を含む」バージョンと「www を含まない」バージョン(例: 「www.example.com」と「example.com」)が区別されます。
Search Console にウェブサイトを追加するときは、「http://」バージョンと「https://」バージョンだけでなく「www を含む」バージョンと「www を含まない」バージョンも追加するようおすすめします。
サイトマップを送信するとサイトのクロールすべきページを認識しやすくなるようです。

コメント